The Bali Pass Trek
Region :- Uttarakhand
Snow: December to March
The Bali Pass Trek is efficiently approachable from the Har Ki Dun Valley because the gradient is much less steep and additionally offers the right time for trekkers to acclimatise to the altitude. You can begin the trek from Yamunotri too, which isn’t always commonly encouraged due to the fact that the altitude advantage from Yamunotri may be very quick and steep for fast-tired trekkers.
There are a few campsites along the Sankri path, and the itinerary can be easily modified to suit the needs of trekkers.
The byskip is tried from Thanga, which is located at 4100 meters. In addition, we will also push to camp at the bottom camp at a whopping 4,600 metres of altitude. It alleviates stress for the byskip crossing the day while also providing a completely unique experience of tenting at an extremely high altitude.
The Bali Pass Trek is effectively approachable from the Har Ki Dun Valley as the gradient is less steep & also gives good time to trekkers to acclimatize to the altitude. You can start the trek from Yamunotri too, which is not generally recommended because the altitude gain from Yamunotri is very quick & steep trail cab quickly tire trekkers. There are multiple campsites from the route of sankri & itinerary can be easily changed as per the convenience of trekkers.
The pass is attempted from Thanga, which is situated at 4100 meters. Also, we can further push to camp at the base camp at a whopping 4,600 meters of altitude. It reduces the strain for the pass crossing the day and further provides a unique experience of camping at a very high altitude.
Day 01: Dehradun to Sankri
• Altitude: 1,950m/6,400ft (Sankri).
• 220 km drive – approx 10 hours.
• Pick up time 06.00 am at the parking of Dehradun railway station.
• Expected arrival time to Sankri – 5:00 pm.
• Keep original and copy of ID proof handy, have to show at the forest check post of Sankri.
• Available network BSNL (erratic).
• Breakfast and lunch on the way (not included in the cost).
• After Pulora keep a warm jacket handy.
• Local Market is available.
• Full functioning AMT at Pulora.
• Sankari is the last road head to the Govind Balabh Pant Wildlife Sanctuary.
• Dinner at guest house (included in the cost).
• Stay in Guest House (twin or triple sharing).
Day 02: Sankri to Seema via Taluka
• Altitude: 2,600m/8,500ft (Seema) and 2,100m/6,700ft (Taluka).
• Altitude difference: 650m/2,100ft.
• Sankri to Taluka drive 12km, 1 hour.
• Taluka to Seema trek 12km, 7-8 hours.
• Most of the trail is gradual ascent.
• Walk though the Supin River.
• Trek is in the forest of Deodar trees, Bamboo, wild roses, irises and chestnut.
• Enough source of water on the way.
• Osla village is opposite to Seema.
• Packed lunch on the way.
• Stay in tent (Twin sharing).
Day 03: Seema to Rainbasera
• Altitude: 3,100m/10,200ft.
• Altitude difference: 500m/1,700ft.
• Trek: 10km, 6-7 hours.
• Moderate to difficult ascent and descent.
• Can see the confluence of Har Ki Dun and Ruinsara rivers.
• magnificent view of Black Peak (Kala Nag) from Debshu Bugyal.
• Trek along with the Ruinsara river.
• Mixed scenery of forest, meadows and boulders.
• Enough source of water.
• Packed lunch for the day.
• Stay in tent.
Day 04: Rainbasera to Ruinsara Tal
• Altitude: 3,600m/11,800ft (Ruinsara Tal).
• Altitude difference: 500m/1,700ft.
• Trek: 7 km, 4-5 hours.
• Moderate ascent.
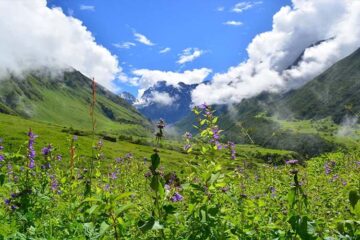
• Ruinsara lake is surrounded by meadows and rhododendron bushes.
• Mixed trail of boulders and meadows.
• Can see waterfall on the way.
• Enough source of water.
• View from camp site: Yamuna Kanta (the pass which takes you to Yamunotri), Banderpooch Peak, Dhumdhar Kandi Black Peak (Kala Nag) and White Peak.
• Packed lunch on the way and light lunch at camp site.
• Camping near by the lake.
• Stay in tent.
Day 05: Ruinsara Tal to Odari
• Altitude: 4,000m/13,100ft.
• Altitude difference: 400m/1,300ft.
• Trek: 4km, 3-4 hours.
• Peaks: Swargarohini.
• Steep and gradual mixed ascent.
• Limited source of water.
• River crossing by making human chain.
• Odari means a naturally made rock cave.
• It is believed that Bali (Hanuman’s brother) stayed in Odari for one night.
• Hot lunch at the camp site.
• Stay in tent.
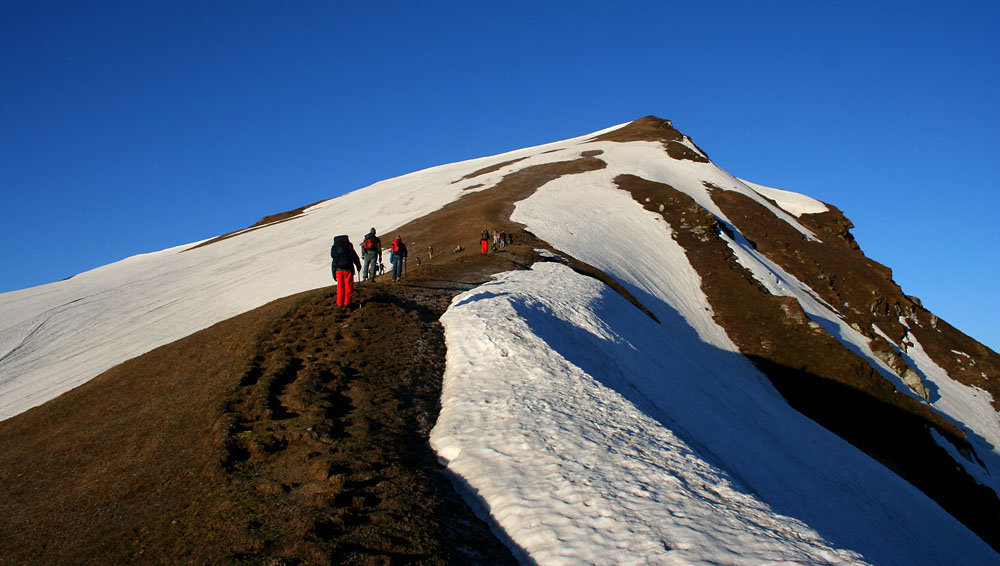
Day 06: Odari to Bali col camp
• Altitude: 4,600m/15,100ft.
• Altitude difference: 600m/2,000ft.
• Trek: 5 km, 6-7 hours.
• Steep and technical ascent .
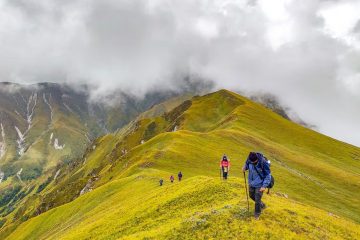
• walk on a mountain ridge.
• No source of water.
• Packed lunch on the way and lite lunch at camp site.
• Stay in tent.
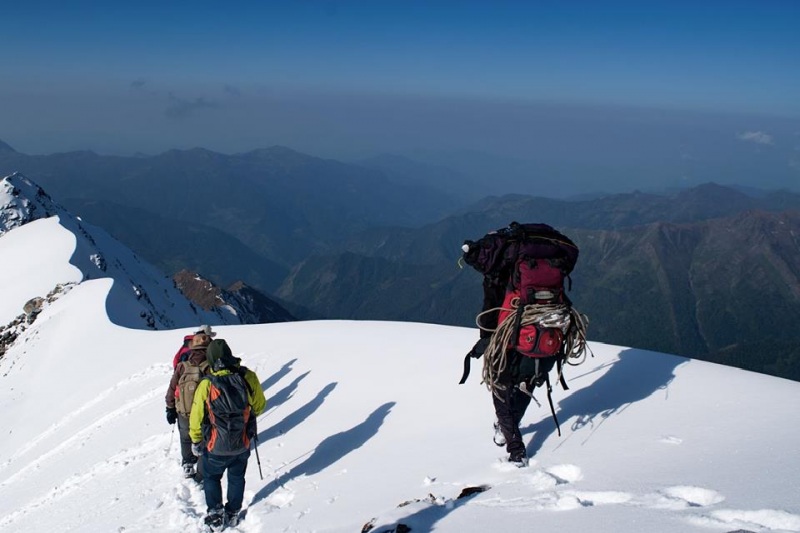
Day 07: Bali col camp to Lower Dhamni via Bali Pass
• Altitude: Bali Pass 4,950m/16,200ft, Lowar Dhamni 3,400m/11,100ft.
• Altitude difference: -1,200m/4,000ft.
• Trek: 14km, 10-11 hours.
• Steep and technical ascent of 1-1.5 hours till the Bali Pass.
• Summit View: Bandarpoonch, Kalanag (Black Peak), Ruinsara and Yamuntori side, logical route to Saptarishikund.
• After Bali pass, half of the trek is technical descent.
• Always stay with Trek Leader or Guide because the route after the pass is confusing.
• Packed lunch on the way.
• Carry enough water from your camp site (Bali col).
• Stay in tent.
Day 08: Lower Dhamni to Jaan ki Chatti and drive to Dehradun
• Altitude: 2,600m/8,500ft. (Jaan ki Chatti)
• Altitude difference: 800m/2600ft.
• Trek: 8km, 4-5 hours.
• Easy and well-defined trail.
• Enough source of water.
• Packed Lunch for the trek.
• 170km, 7hours drive.
• You will be dropped at Dehradun station in a Tata Sumo or a similar vehicle.
• Drop to Dehradun is included in the cost.
• Lunch on the way (not included in the cost).
• Driving time to Dehradun may increase due to of heavy traffic. Make your further travel plane from Dehradun after 8:00 pm.
Day 1- Dehradun - Sankri
Sankri, the starting point for the Bali Byskip hike, is the primary stop. The Govind Wildlife Sanctuary is home to a small Uttarkashi community. The Kempty Falls, Nainbagh, and Mussoorie are many of the points of interest along the way from Dehradun to Sankri. It is surrounded by the peaks of Swargrohini and different Greater Himalayan mountains.
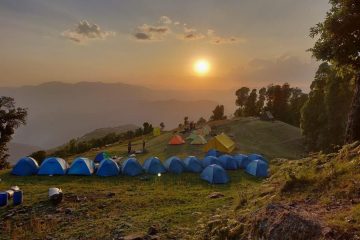
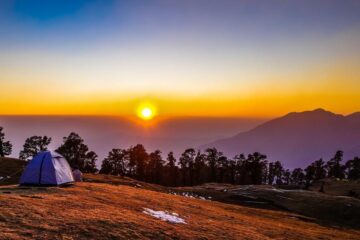
The nighttime skies have all started to ascend by the point you attain at Sankri, offering ever more impressive vistas. This is a fantastic start to the journey ahead. You can both live in a lodge or a homestay here.
Day 2- Sankri to Seema via Taluka
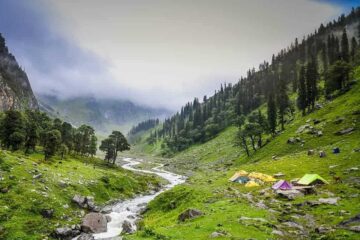
Start your day with breakfast and a force to Taluka in the early morning. It’s from right here that we’ll start our trek. The 12-kilometer driveway passes through huge streams, bamboo, and deodar trees. It’s like going round a chain of mountain curves. Camping is to be had at the Forest Rest House, and trekkers regularly camp right here.
Begin your adventure from Taluka on a stone path that leads to the riverbed. From right here on out, the path follows the Supin River. After traversing some timber and cement bridges, the street gradually ascends. On the left, after approximately an hour, open grounds can be visible. Many locals are concerned with their paintings in this vicinity. They meet a different kind with smiles on their faces. After a 2-hour hike, you’ll encounter a few lovely, formerly omitted timber structures. Ghangad is the call of the village. The dhaba and water-run mill are a 20-minute stroll away.
We drive another hour from here to another tenting location where a shape is being built. A timber bridge leading to Osla village can be seen. If you haven’t heard, Osla is becoming increasingly popular as a vacation destination due to its unique timber dwellings. To attain Seema, retain hiking for 60 minutes through the woodland along the Supin River. Keep your eyes peeled for Himalayan Monal within the woodlands. Seema is usually a tenting area with a huge range of trekkers. Spend the night in tents and unwind.
Day 3- Seema to Rainbasera
To visit our first huge destination, Debshu Bugyal, we’ll have to begin from scratch. Begin on foot at the Supin River’s left financial institution. As you get towards Debshu Bugyal, the path starts to ascend and will become steep. There can be boulders on the street when you attain in the Ruinsara Valley. As you continue climbing, keep an eye out for views of the much-mentioned Oslo settlement. Debshu Bugyal starts off-evolved after some other half-hour of flat walking. The Bugyal is a massive pastureland with a period of two kilometres in which you could relax for a bit. The meadows offer views of Kala Nag and Black Peak.
From here, the path dips unexpectedly till you attain the riverbed. The path is strewn with stones and has a slick surface. You’ll have to cross a bridge again soon. Take inside the stunning surroundings all around you. The path has a tough upward thrust ahead of you, lots of your dismay. Rainbasera, the following campsite, has one modest hut. Watch the sun set over the speeding river. Many hikers experience the tranquilly of the riverbed stones. Tents are to be had for rent.
Day 4- Rainbasera to Ruinsara Tal
This is an interesting day on account that our subsequent tenting spot might be the much-predicted Ruinsara Lake. The path might be just like the one from the day before. Continue going for three-to-four hours till you attain the frame that displays the light. To get to the lake, you’ll have to see glaciers from afar, cross streams, and embark on a variety of adventures.
In many ways, the tenting spot these days might be a dream come true. It is located between the Supin River and the Ruinsara Lake, surrounded by meadows and remote snow-capped mountains. The Bandarpoonch range’s majestic peaks, along with Bandarpoonch, Kala Nag, and Dhumdhar Khai, in addition to White Peak, dominate the skies. Yamontri Temple is likewise positioned nearby. Simply take a walk across the neighbourhood and take in the sights.
Day 5- Ruinsara Tal to Odari
Today can be a brief day with the most effective four-kilometer walk, so rejoice! The path leads right all the way down to the Supin River. The path passes through woodlands and alongside a river. The slope turns steep yet again earlier than accomplishing the following meadows. The better peaks can be seen from the meadows. This course serves as a preview of what youve seen in the course of the previous few days.
Surprisingly, greenery will become increasingly scarce in the future. Odari can be reached in a kilometre. There’s a rock cave near the tenting area. As a result, the call of Odari, because of this cave, becomes chosen. Bali (Lord Krishna’s younger brother) is said to have spent the night in this cave. Swargrohini 1 & 2 can also be seen from this vantage point. After lunch, the Trek Leader will lead a few scholastic exercises to be able to be useful as you ascend.
Day 6- Odari to Bali col camp
Even if the day seems to be shorter, it isn’t always without difficulty. On a 60-degree incline path, there may be an excessive ascent. It’s just like a ridge hike, but with extra unfastened rocks and scree. The path is likewise paved, making it extra tough to navigate. Make sure you get masses of relaxation and drink masses of water. Because the peak upward thrust is significant, take suitable precautions to keep away from AMS.
Temperatures at night are often below zero degrees. It’s a great concept to be prepared for the cold. Rest in tents after strenuous exercise.
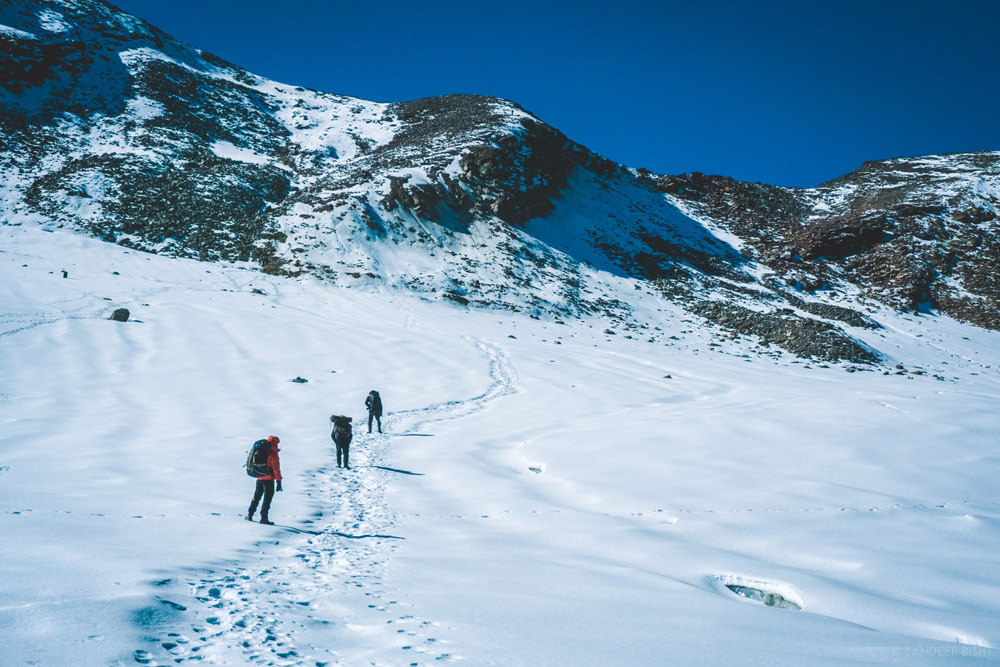
Day 7- Bali col camp to Lower Dhamni via Bali Pass
This is the day that you may name the summit. You’ll need to take the Bali Pass today to get to Lower Dhamni. Consume a considerable quantity of meals to make sure you have sufficient energy to get through the day. The path is as steep as Bali Pass is steep and snow-covered. Only observe the part of the street that has been damaged via the means of your guides. There isn’t any want to rope up, despite the fact that microspikes ought to be worn if necessary.
You will attain the pinnacle of the byskip after a hard ascent of two to three hours. The byskip is about 10 ft wide at its narrowest point and 30 ft wide at its widest point. The byskip is the best factor, and you’ll feel as if you’re on top of a mountain. Enjoy a wide-ranging photo of the Swargarohini, Banderpooch, and Garhwal peaks. On the right, take in the vistas of the Yamnotri Valley. Take advantage of the surroundings and the existing time. Hold your breath as you fall, for the actual amusement is ready to start.
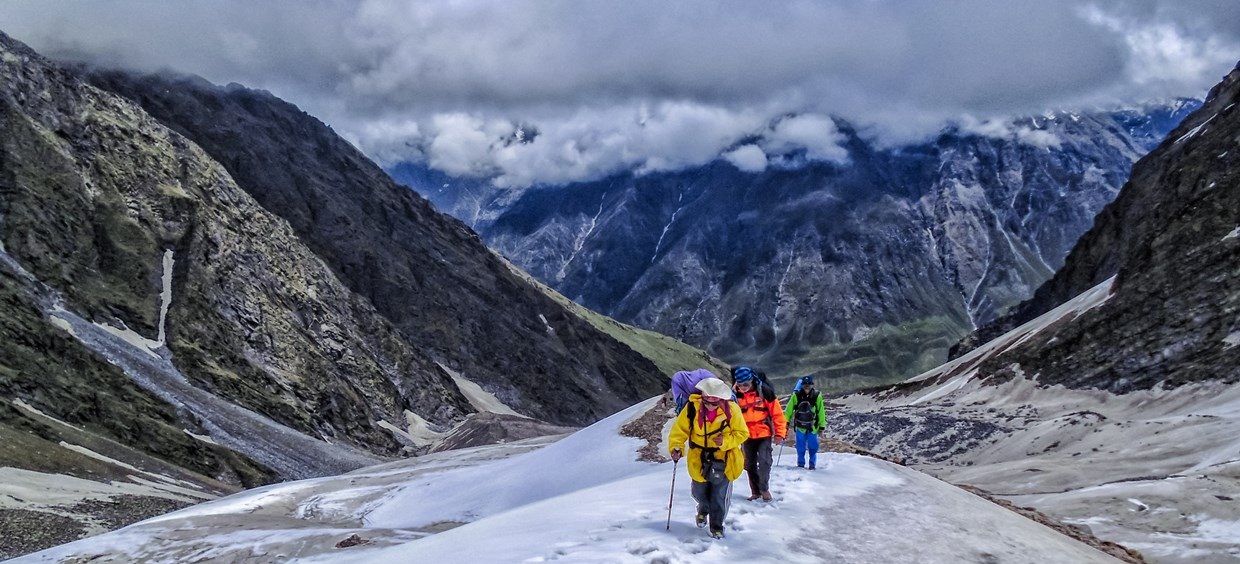
The descent is almost ninety degrees with a restrained direction. Use appropriate practises and take note of your instructions. Even after the leg segment, the terrain is sincerely difficult until higher Dhamni, so be cautious. Due to the snow, it could probably be hard. Rest at Upper Dhamni after this hard section. The adventure from Leg to Dhamni is perplexing, like a maze, so stick collectively in a set and observe your guide.
We will start our stroll to Lower Dhamni after resting. Because the direction is convoluted, it’s far better to stay with your trek chief and crew. From here, the tune might be audible and visible. The route is two-to-three kilometres long and runs through the forest. Take a break from your tents. This will last throughout the stay in tents.
Day 8- Lower Dhamni to Jaan ki Chatti and Drive to Dehradun
The trek’s very last day has finally arrived. This might be the very best day, with many descents and minor ascents. The song is a well-saved concrete path. There is a minor ascent to Yamunotri, which could take an extra 1-2 hours. To get to Dehradun, get up early and go away from the campsite.
By Air:-
Dehradun’s Jolly Grant Airport is located about 20 km from the city. You will find a daily flight from Delhi to Dehradun.
Taking the train:
Take the overnight train to Dehradun from Delhi.
- Nandadevi Express-Departure at 11:50pm; Arrival at 5:40am
- Dehradun Express-Departure-9:10pm; Arrival-5:00am
By Bus:-
From Delhi’s ISBT Kashmere Gate, a regular bus service from Delhi to Dehradun is available.
Includes
- Meals during the trek
- Transportation from Dehradun to Sankri and back to Dehradun.
- Dinner on arrival day in Sankri.
- Forest Permits/Camping Charges (only if availing transportation through A1 Himalayas). Only up to the amount charged for Indian Nationals is included.
- Tents, sleeping bags, mats
- Safety equipment includes static rescue rope, seat harness, carabiners, pulleys,
- Trek guide, cook, helpers, porters, & mules for carrying common luggage.
- The Services of a Certified Trek Leader
Excludes
- Meals during road journeys
- Carriage of personal bags during the trek
- Any kind of insurance
- Any expense of a personal nature.
- Any expense not specified in the inclusion list
1) Trekking Shoe/Snow Shoe
2) Rucksack/Back Pack
3) Rucksack cover (Waterproof)
4) Daypack/Knapsack
5) Undergarments/Innerwear
6)Woolen socks
7) Woolen gloves
8) Waterproof gloves
9) T-shirt
10) Trek pants
11) Camp sandal
12) Balaclava/Woolen skull
cap/Monkey Cap
13) Sun cap/Wide-brimmed
Hat/Bandana
14) Walking Sticks/Trekking
Poles/Ski Poles
15) Heavy Jacket
16) Windproof Jacket/Wind
Cheater
17)Raingear/Poncho/Waterproof clothing
18) Water bottle/Hydration pack
19) Sunscreen lotion
20) Sunglasses
21) ChapStick/Cold &
Moisturizing cream
22) Toothbrush and toothpaste
23) Towel
24) Hand sanitizer
25) Tissue roll ( Toilet)
26) Anti Fungal Powder
27) Torch/Head Lamp with extra batteries
28) Knee cap
29) Camera with extra cells
30) Dry food items
31) Personal first-aid kit
32) Medicines (This is a simple
guide line and a doctor’s
consultation is recommended.)
Altitude is a risk. Before you begin the trek, you should be aware of the effects of high altitude on your body. Acute Mountain Sickness (AMS) symptoms include a moderate headache, nausea, and overall discomfort.
Response: If you have any of these symptoms, notify the trek leader immediately and follow his advice. To deal with the scenario, each campsite contains a stretcher, a fully prepared first aid kit, and oxygen cylinders.
Weather Risk : No one can guarantee snow, rain, or sunlight, even if we keep a constant eye on the weather. Please keep in mind that your safety is our primary priority, and if the weather isn’t cooperating, we won’t leave the campsite.
Response: The choice to go or wait for better weather will be made solely by the Trek Leaders and Guides.
Risk: Injury is a possibility. While trekking across difficult terrains, minor injuries such as calf sprains, bruising, and other minor ailments are prevalent. Serious injuries, such as fractures or significant cuts, are quite uncommon.
Response: All of our Trek Leaders are trained in wilderness first aid. They’ve been taught to deal with emergencies and have a well-stocked first-aid equipment to deal with minor injuries. In the event of major injuries, the patient is carried to the nearest road-head on a stretcher and taken to the nearest medical facility.
DO’S AND DON’TS ON A TREK
1. Alcohols or any other intoxicating products ‘’STRICTLY PROHIBHITED’’
during the trek.
2. Always pay heed to the trek guides or instructors.
3. Try not to leave the group under any circumstances.
4. Avoid trekking during the nights as it is extremely dangerous.
5. Avoid using earphones as that might hinder your hearing.
6. Do not participate or encourage littering of the places in any form.
7. While visiting the local villages and tourist sites, obey the local guidelines
and instructions.
8. Do not harm or interrupt the local sentiments of the places.
IMPORTANT:
Your safety is of paramount concern while traveling with A1 Himalayas.
Please note that your leader has the authority to amend or cancel any part of
the itinerary if it is deemed necessary due to safety concerns. Since adventure
entails traveling in remote mountainous regions, we cannot guarantee that we
will not deviate from it. Weather conditions, health condition of a group
member, unexpected natural disasters, etc., can all contribute to changes in
the itinerary. The leader will try to ensure that the trip runs according to plan,
but please be prepared to be flexible if required.